This website uses cookies to improve your experience while you navigate through the website. Out of these cookies, the cookies that are categorized as necessary are stored on your browser as they are essential for the working of basic functionalities of the website. We also use third-party cookies that help us analyze and understand how you use this website. These cookies will be stored in your browser only with your consent. You also have the option to opt-out of these cookies. But opting out of some of these cookies may have an effect on your browsing experience.
AAN High Output Coil Conversion Installation
Tools Required:
-
5mm Allen Wrench
-
Screw Driver
-
1/4” Drill
-
10mm wrench
Installation
-
Disconnect battery ground
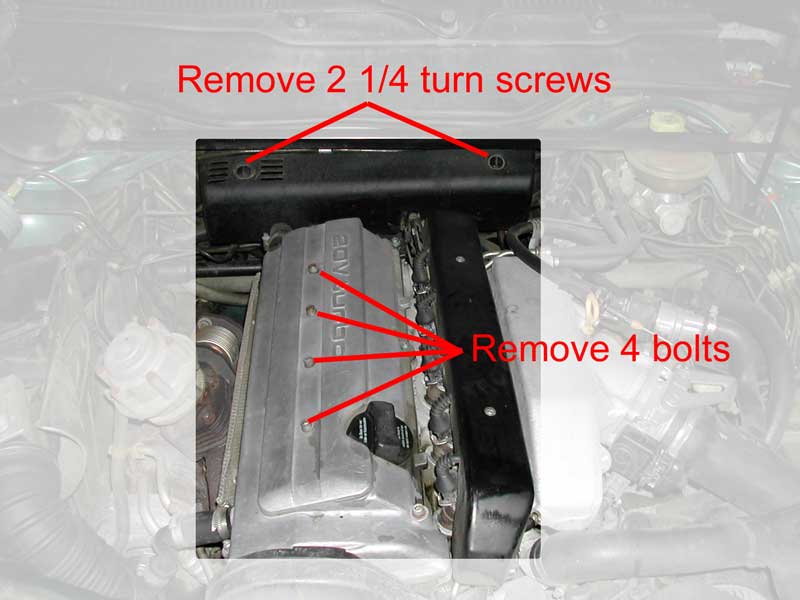
- Remove 4 bolts securing stock coilpack to engine, remove 2 ¼ turn bolts securing black plastic cover behind engine.
-
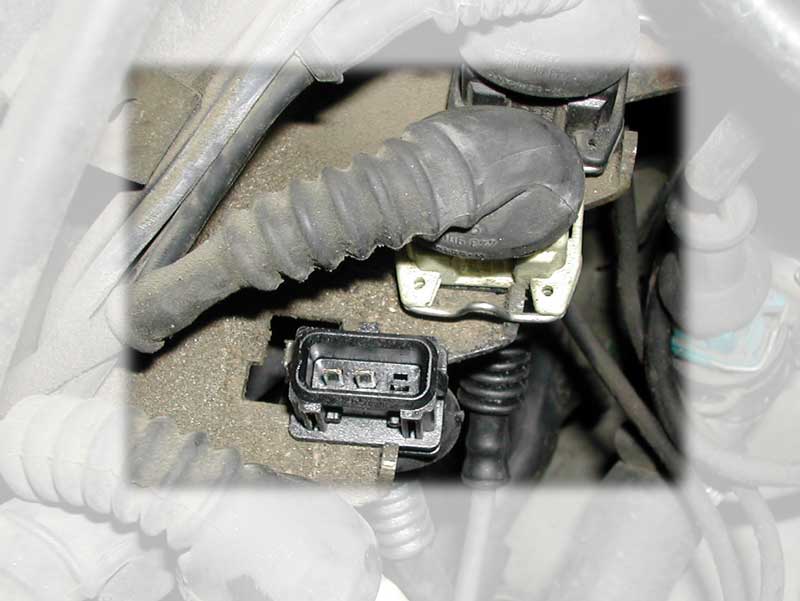
Unplug stock coil harness from 2 power output stages, 2 coil power connectors, and remove the ground ring at the back of the head. Remove the coilpack and power output stage modules. Breath a sigh of freedom.
-
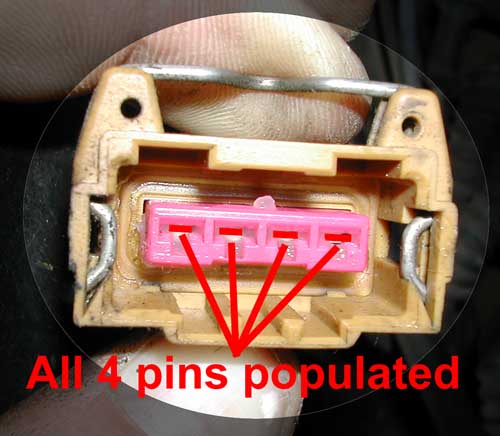
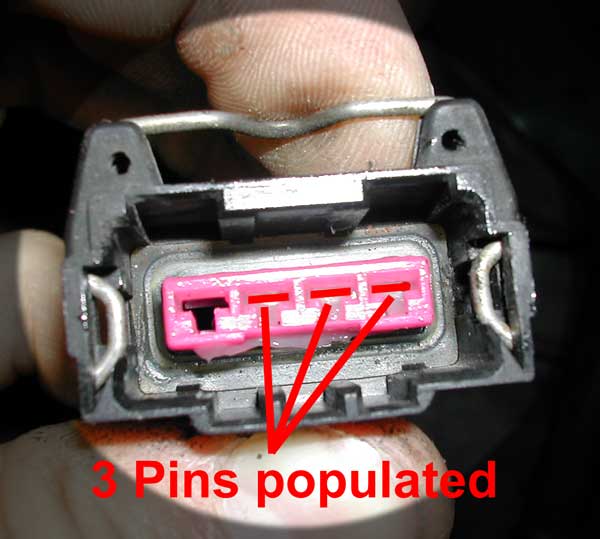
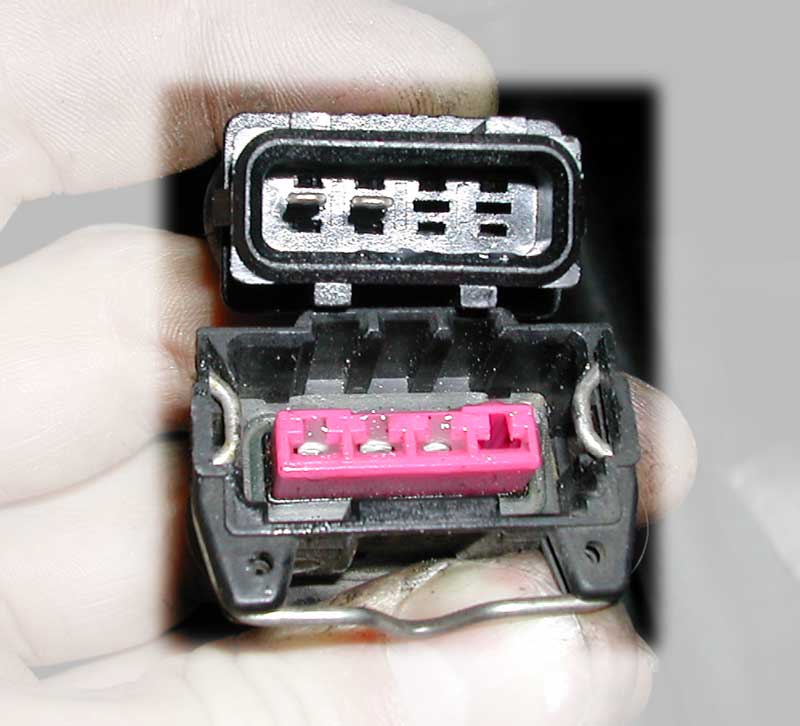
Your stock vehicle power output stage connectors will be a 4-pin connector plugged into the POS units, one should be brown the other black. Remove these connectors and inspect that they are setup in the proper stock configuration. The Brown connector should have 4 pins, the black 3. If they have been altered and you are unsure of the stock pins being in the proper location contact us, or consult a factory repair manual with the appropriate wiring diagrams.
-
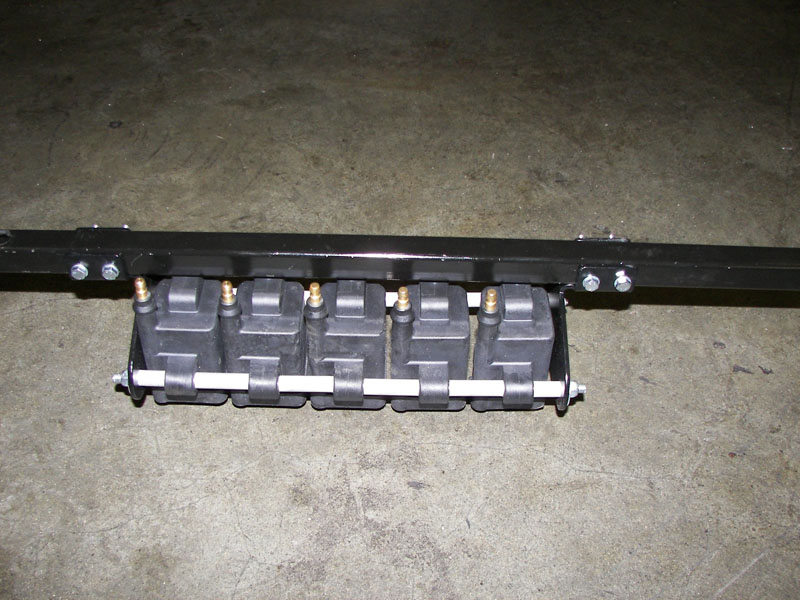
Hang the new coils with brackets on the strut bar. Mark the holes to be drilled for the brackets.
-
Remove the strut bar and drill the holes for the mounting hardware. A 1/4” drill is sufficient. Then bolt the coil assembly to the strut bar.
.jpg)
-
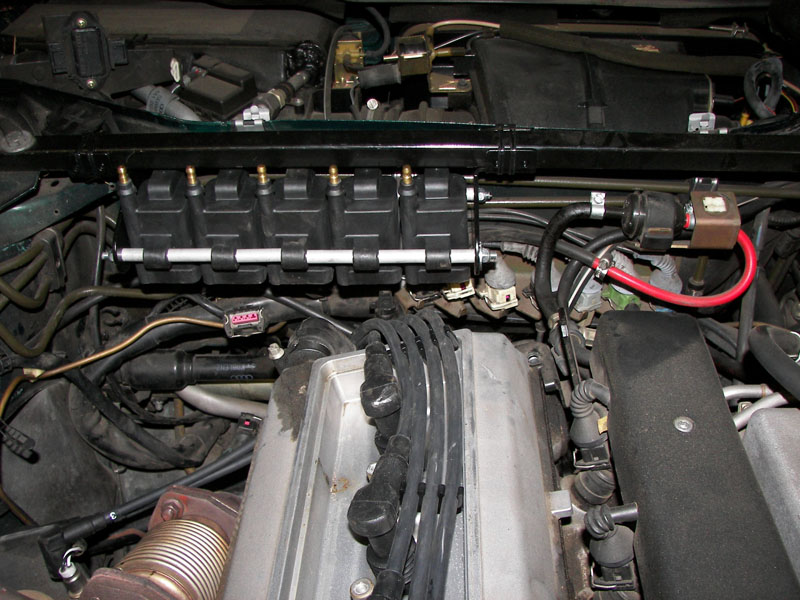
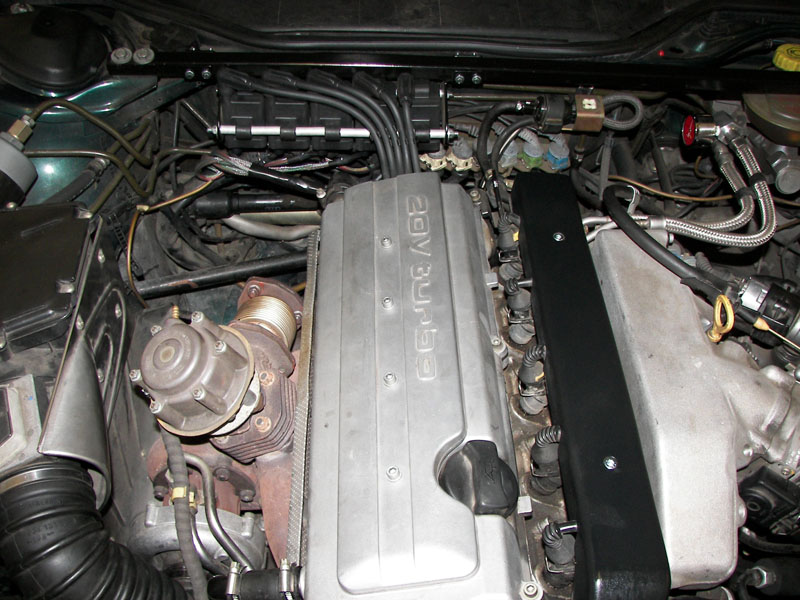
Re-Install assembly into car.
Optional: Removing stock coils from cover will allow cover re-installation, take care to check for clearance and pinching around rear of cover where plug wires exit. When reinstaling the cover, you will need to clearance the cover to avoid pinching, depending on what plug wires you are using. Please look at the picture below:
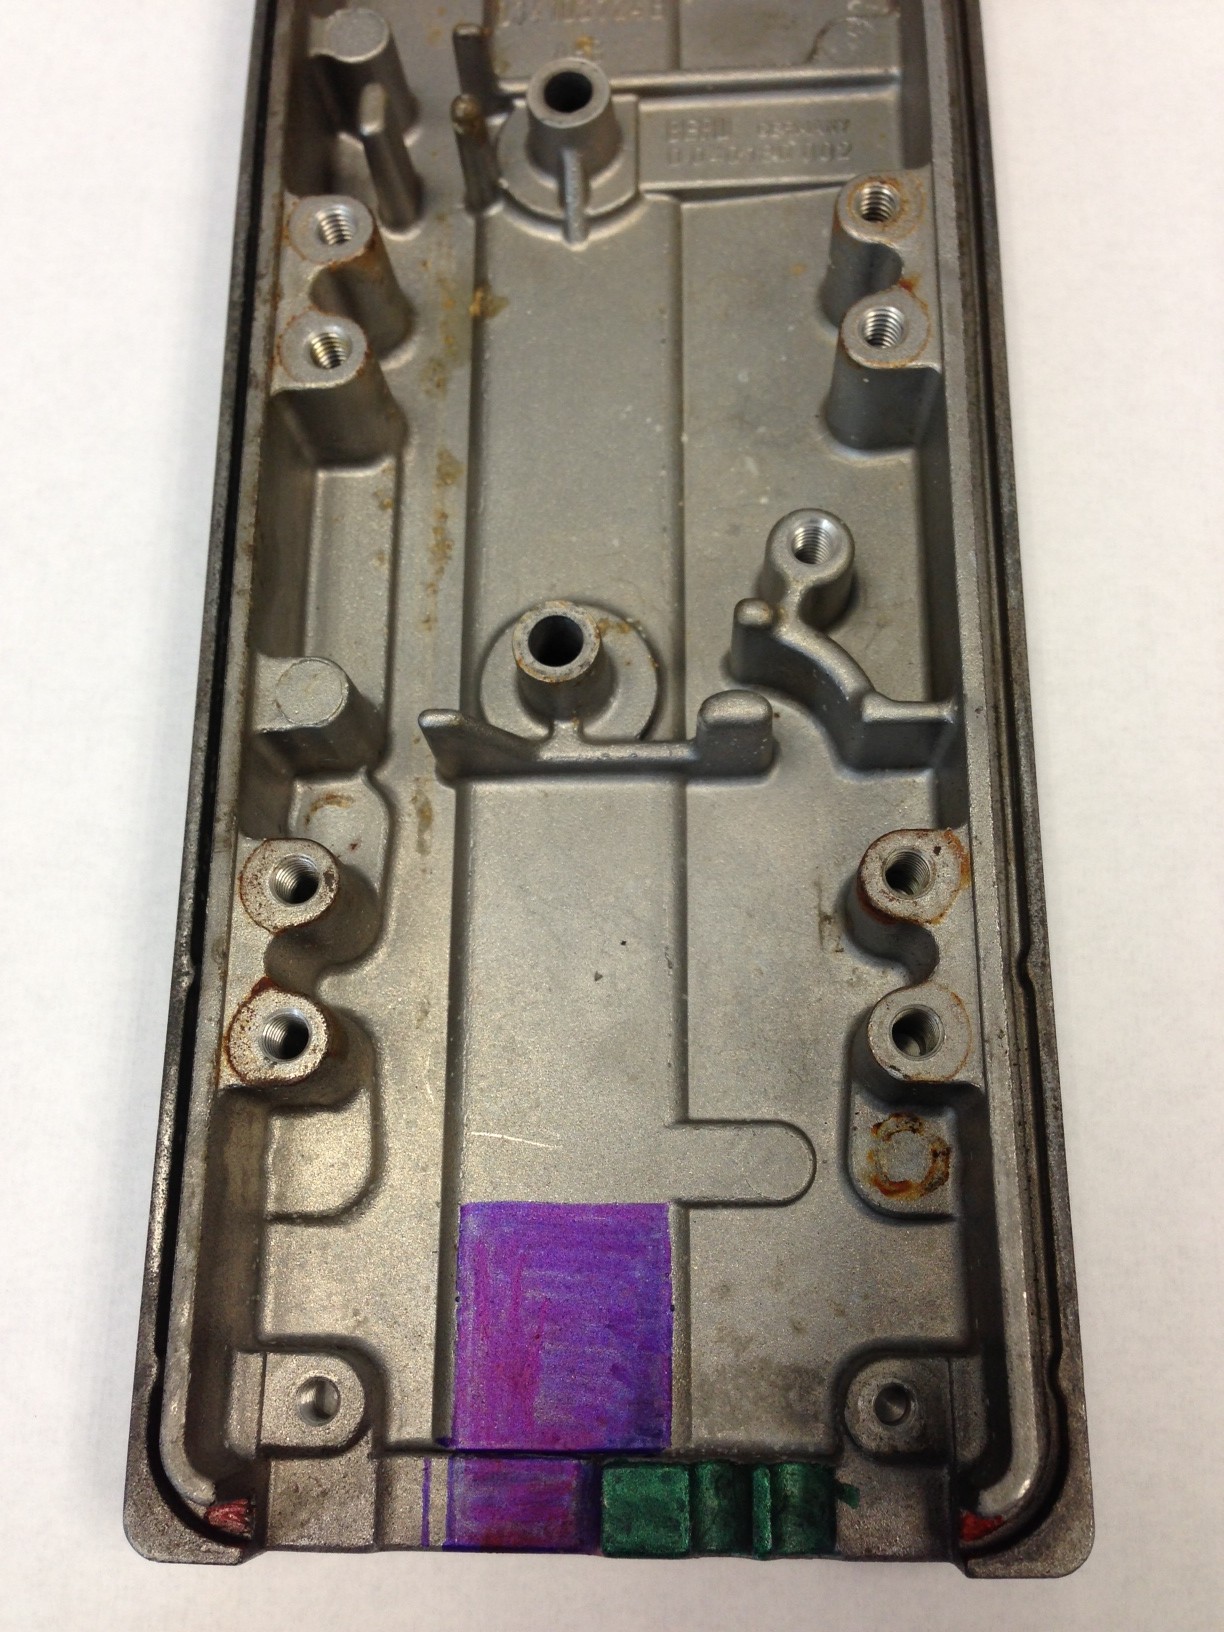 Red dots on either side of the main opening are where a factory gasket is located. The gasket can be kept, but it must be cut at the red dots to prevent pinching of the spark plug wires.Green colored area should be ground flat/smooth so wires do not get pinched between cover plate and valve-cover. If wires are pinched and "crushed" in any way this will eventually cause them to arc and will void any warranty.Blue colored area should be cut open, then ground smooth if you are using Magnacore wires. These wires are a great upgrade, but do NOT fit inside the standard opening at the back of the coil cover without being pinched. If wires are pinched and "crushed" in any way this will eventually cause them to arc and will void any warranty.
-
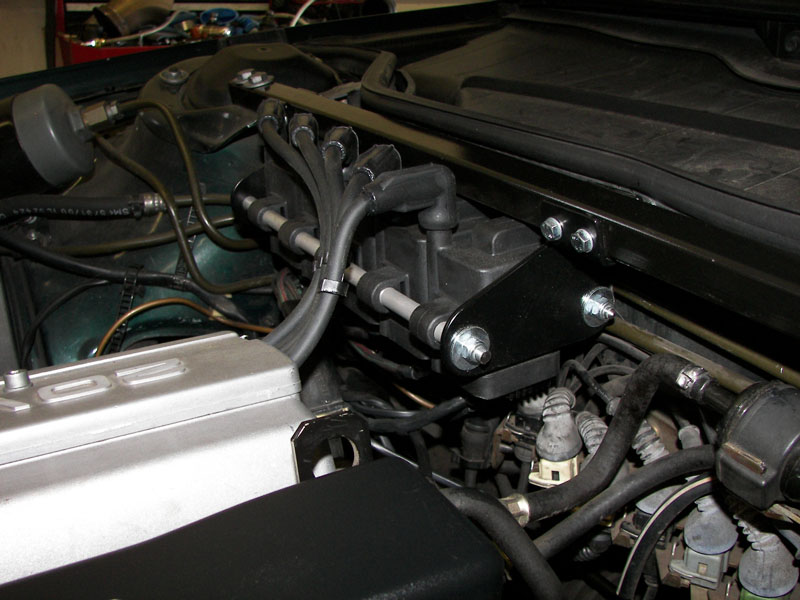
Plug your new 034 harness into the coils provided in the kit. Plug in the two 3-pin connectors to the factory harness, it doesn't matter which connector gets plugged in to which female 3-pin. These are the coil power leads.
-
Plug in the two 4-pin connectors to the factory harness. Take note that you are plugging them in correctly. You will notice that one connector has 4 male pins, the other has only 2. Make sure the 4-pinned connector gets plugged into the brown/fully populated connector. The other with the missing pins gets plugged into the black female connector with 3 pins.
-
Using the stock hardware bolt the harness ground to the stock location.
-
Done!